A few weeks ago I started to get bored by my own feed.
Don’t get me wrong- I love my style of photography but it got more and more annoying to form a „perfect“ feed. I didn’t want to kill my pictures by applying a crazy strong preset that tones everything down.
Soo, I kinda came up with something else:
The Instagram Puzzle Feed – I was looking for a different design- and I found it.
As I am quite close to 10.000 Followers and the questions about my feed come in more regularly, I decided to sum everything up in one post. In this guide I am showing you how you can easily develop your own puzzle feed for Instagram …
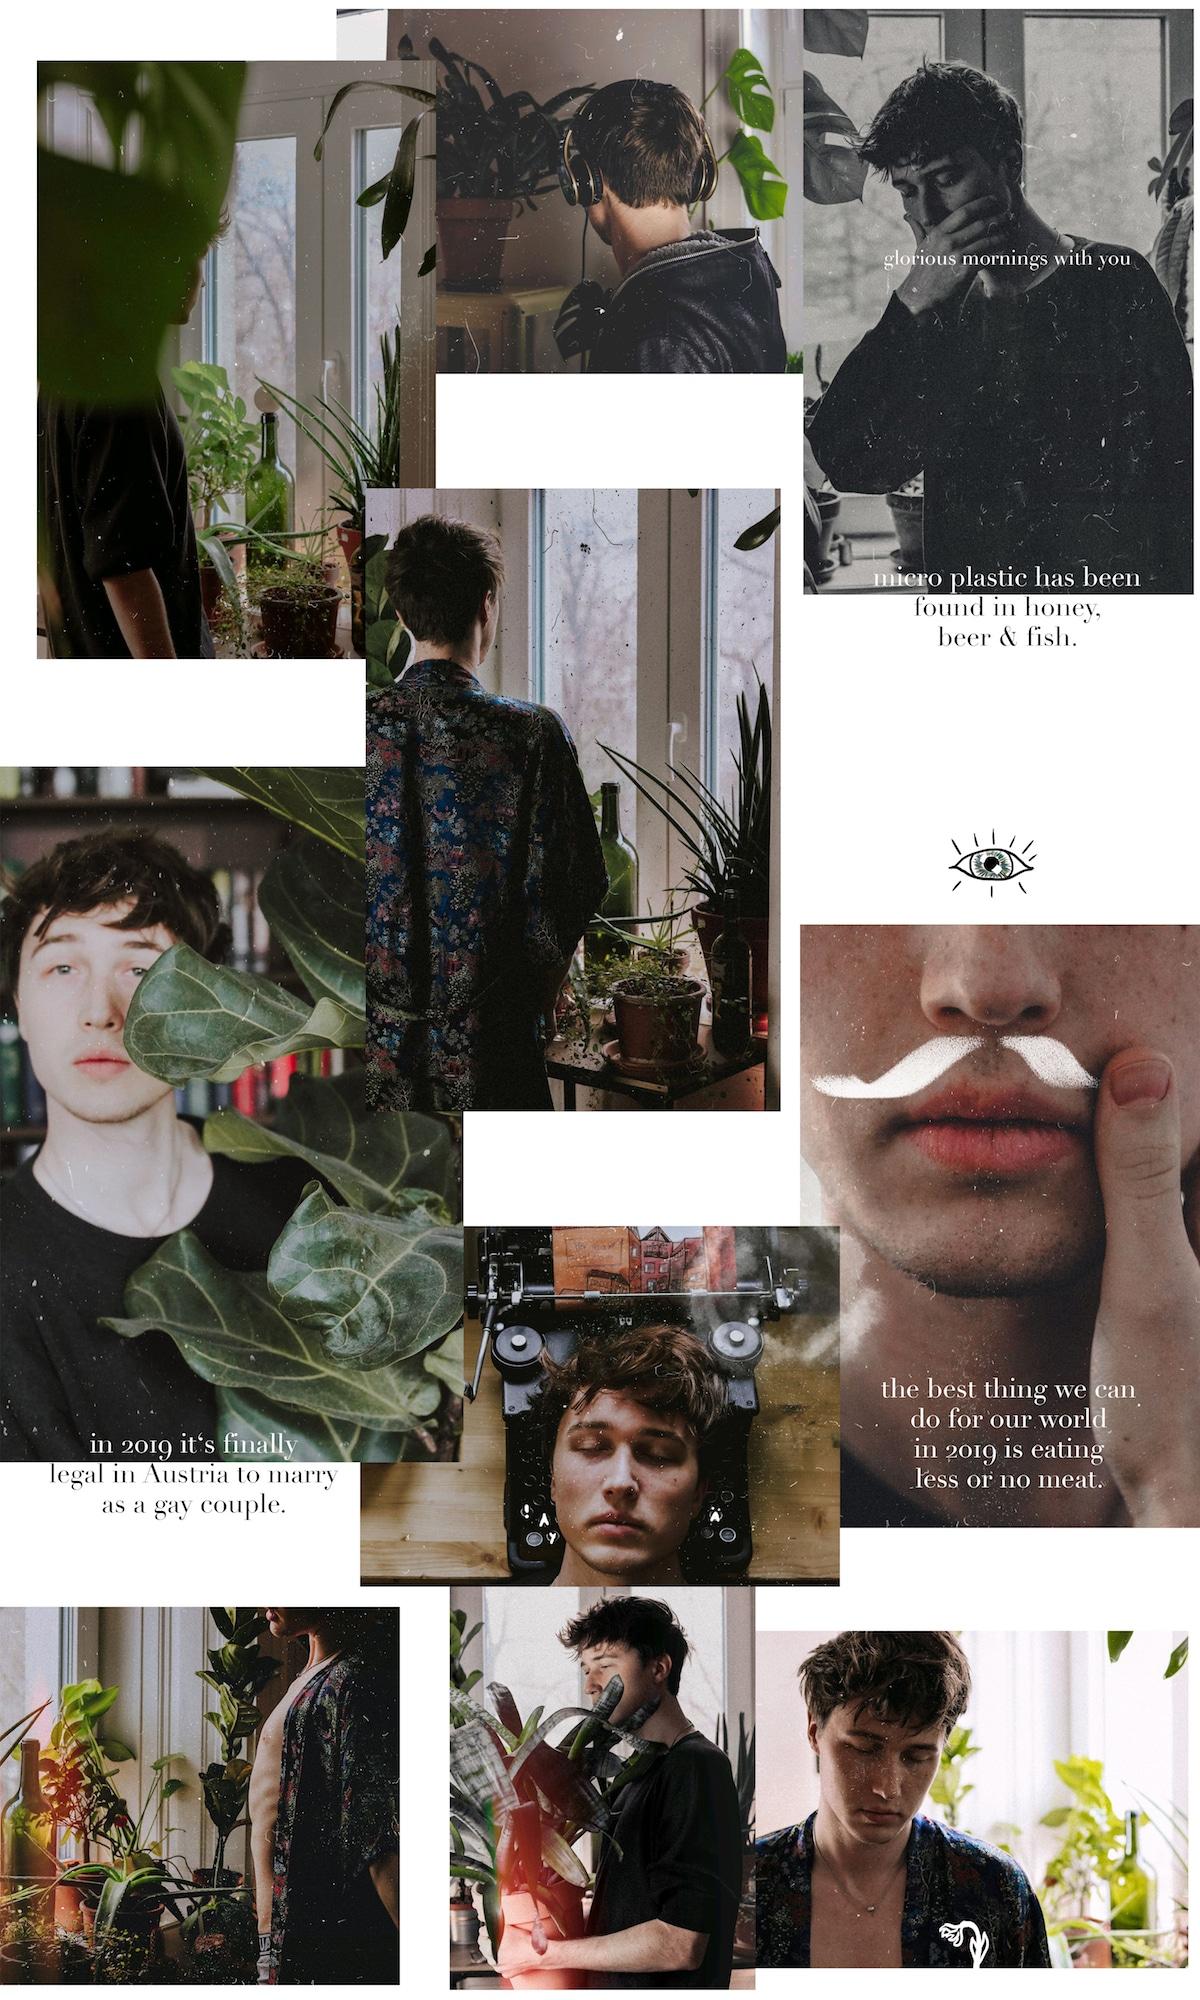
A preview of how I design my feed:
Check my feed here to see how my puzzle design for Instagram looks in practice.
Lightroom for improving your photographs (Lightroom is automatically a part of the Photoshop subscription)
Wacom Intuos – the tablet I am using
Step by Step
1. Let’s go
Open Photoshop CC and set up a PSD file 3000px wide by 4000px high.
By choosing this size you will end up with 12 pictures for you Instagram Feed.
You can vary the size however you want, of course. If you got enough material to fill a bigger feed, go ahead!
2. Show the grid
You need a grid to properly design your feed. Go in Photoshop CC (on the Mac) to View > Show > Grid.
3. Set grid
To set the grid to the right sizes, go to the Photoshop CC menu > preferences > Guides, Grids & Slices. Set the gridline to 1000px and 1 subdivision.
6. Import your pictures
Choose your pictures and simply drag them onto the canvas. Photoshop will generate a new layer for each picture, which comes in pretty handy, when …
7. Arranging
Drag the pictures wherever you want to. Resize, cut … until you are pleased with the content. My style looks something like this:
8. Decorate your feed
Decorate your canvas to fit your brand style. I am using my Pen-Tablet and typekits from Photoshop CC.
9. Slice Tool
The next step is to cut slices. Take the slice tool set it to fixed size, 1000px x 1000px at the top of your screen.
Now click on the top left corner of every grid box. This will automatically create a slice with the right size for instagram. If you did not hit exactly the right spot, you can easily rearrange the slices so they fit your grid perfectly.
11. Saving your tiles
As soon as you’re done, you need to save the tiles. Go to: File > Export > Save for Web (Legacy). Make sure you toggle JPEG as format and maximum quality (12).
In the next window, make sure to only save images, without the HTML code.
12. You are good to go!
You will find all of your tiles in one place- and in the order you made the slices in. So make sure you’re planning beforehand.
Just send them to your phone, and that’s that.
EXTRA
What Apps am I using?
They are part of my style- so here you go. I am currently using an Android phone, so there might be some differences to an Apple device.
I am mostly using Nebi to create the dusty and scratch effect. The app itself is for free, but the good scratch filters cost about 1€.
Sometimes I am also using the app Afterlight, which has great scratch filters and is completely free on Android. (It costs something on Apple.)
To edit my photos I use my own presets in Lightroom. (Lightroom is part of the Adobe Subscription I linked here. My presets will be available in my online shop soon).
Have fun creating your most creative feed ever!
I would love to get to see more puzzle feeds, so tag me in your pictures and I will check them out!
*Affiliate-Links: (nothing’s changing for you, only I get a small percentage of the price)